Friday, June 15, 2007
Thursday, May 10, 2007
SRAM X9 Rear Mech & Shifters
For about 3 years I have fitted my bikes with Shimano XT drivetrain including crankset, front and rear mechs and shifters; however recently I bought a job-lot of SRAM X9 cheap on e-Bay (rear mech and front and rear shifters). I was interested to see how the SRAM compared to my trusted XT.
During my 3 years with XT I have gone through a couple of cranksets, 4 cassettes, 8 sets of chain rings, new bottom bracket bearings every 3-4 months and 5 rear mechs. I’ve always liked XT although I find getting the gears set up to be consistently super smooth is a hassle. When the gears are on-song the shifting is very smooth but I find it requires constant cable adjustments to keep them smooth and I have become used to ‘over-pushing’ the shifters to ensure gear changes. XT is easy to fit, adjusting the rear mech high & low stops is straightforward however I find that the screws need to be adjusted and then the mech physically pushed across to see where it ‘stops’ achieving 100% accuracy is very difficult. Tensioning the cable is the usual fiddle. It was at this stage when the differences between the SRAM X9 and XT started to become apparent.
The SRAM rear mech looks more flimsy than XT but the most obvious difference before fitting is the strength of the spring, boy is it strong making it very difficult to extend the mech prior to fitting to the bike. The rear mech bolts on no problem. The instructions emphasise setting the jockey wheels at the appropriate distance from the cassette and adjusting the high and low stops accurately. Unlike XT as the SRAM rear mech stops are adjusted the whole mech and cage moves a couple of mm with each half turn of the screws, the screws are also labelled hi&lo for the forgetful (handy for me). Setting the stops is a breeze compared to XT. After all this it was time to fit the chain and the gear cables. No problems, I pulled the cables tight and locked them with the allen bolt. The gears were perfect! A revelation. Changing gear requires a slightly firmer push than XT but the change itself is much more positive and definite. 3 weeks later and the gears have not needed a single adjustment. The SRAM Shifters look conventional but operate on a push-push principle using just thumbs, this was very easy to get used to and after 30 minutes it was second nature.
All in all I’m very impressed with the SRAM set up. I’ve read all about the pros and cons of 2:1 (XT) and 1:1 (SRAM) pull ratios but to me it is irrelevant, the most important thing is how they perform when I use them. I fitted the SRAM X9 to my bike basically because I got it cheap on e-Bay; however I think both the setting up and gear changing are much better than XT and I will keep using it on my trail bike. The downside is cost I tend to snap, bend and break rear mechs on my fun/play bike so for this I will stick to XT which is 50% cheaper. On pure practicality and performance the SRAM X9 is streets ahead of XT.
Posted by
Brighton mtb Club
at
9:11 PM
15
comments
Labels: Component Review, Show All
Friday, April 27, 2007
Nicolai Argon FR & Rohloff Speedhub 6 Month Up-date
Like many MTB’ers in the
A hardtail is harsh compared to a full suspension bike. The Argon is fitted with Hope M4 brakes, the lever of the front brake became jammed in the ‘off’ position, it needed a full bleed and replacement piston set, not too bad after 3 years use with zero maintenance. The frame is stiff and the force from pedalling causes the bottom bracket bearings to wear out relatively quickly, approximately every 3 months. The chain has become stretched way past the limit where my chain length checker says it should be replaced. The single front cog (middle ring of an LX crankset) is also very badly chewed up and needs replacing this must be due to wear from the chain as the crankset is fitted with a bashguard.
On the upside the hardtail is very easy to keep clean during the muddy winter months, a quick squirt with the hoze, lube the chain and the job is done. The Fox Vanilla forks are great. The Rohloff Speedhub has been a revelation; I love it and would fit one to my other bike if I could afford to. The gear changing has been perfect and it is completely unaffected by all types of mud, snow and slush including the thick chewy mud that is common on the
The question ‘is a hardtail more suitable for winter than a FS bike’? From my experience the answer is a resounding yes if you get one with a Rohloff speedhub. The hardtail with speedhub enables me to ride wherever I want to go whatever the conditions, this is freedom that is worth paying for. Without the speedhub then cleaning would be a longer and much more fiddly job also the front and rear mechs would get clogged with mud.
In summary get a hardtail with Rohloff speedhub don’t worry about the cost it will pay for itself in the time saved cleaning the bike and the freedom to ride wherever you fancy whatever the conditions. Get one.
Posted by
Brighton mtb Club
at
11:32 AM
0
comments
Labels: Bikes, Component Review, Show All
Saturday, March 17, 2007
WTB Pure Saddle: New Trail Friend
I have a new riding buddy to accompany me up hill and down dale. My old riding buddy was typically Italian, striking and fast. My new friend is an American; more laid back and easily swaps between one thing and another without fuss. I have had a WTB saddle before, but this PureV Team is meant to be a high-end trail saddle and hopefully suitable for the mixed single track and bridleway riding that I do.
I could not find it available in the
After a few rides of varying lengths and types, I am surprised at the comfort as it is extremely light. It has a shorter nose than my old Koobi, which makes it easier to move off the front on extremely steep climbs and more of a scooped shape that holds me in one position. This might mean less adjustment room on long hot summer rides but it feels easier to find the right pedalling position on long uphills when efficiency reaps its rewards.
Overall, it was surprisingly easy to change so if you do not have a saddle that is ideal for you perhaps it is time to find a new friend.
Posted by
Brighton mtb Club
at
7:08 PM
0
comments
Labels: Component Review, Show All
Friday, February 23, 2007
Winter Tyres, Rubber Side Down
Over the years, many of us have sought to find the perfect winter tyre. So far, I have been unsuccessful but after some recent tyre experimentation, I have remained with Trailrakers. Initially I presumed that the relative difference between tyres was small however after a few swaps the difference was obvious. The main choice for mud seems to be fat and float or thin and sink.
An all year tyre, e.g. Continental Vertical struggles in the chalk and the mud and although it copes well I always was stuck. A great spring/autumn tyre like a Michelin Hot S floats a bit but spins and slides much too easily. A Fire Mud cuts through anything and mud does not stick but it slides under power and tends towards the nervous rather than the surefooted. In a comparison with the Michelin on identical bikes (Nomads), it slid less on chalk and mud but spun out easily in ruts and under power.
Refitting a Trailraker made a noticeable difference in traction in mud, slimy chalk and improved the safety margin. One small point in sizing is that the 2.1 when fitted to a Mavic 717 at 35-psi measures only 1.8 inches. When magazines review tyres they sometimes allude to a variance in the carcass size from the stated nominal size and it would seem that this may be the case with the Trailrakers and although it may improve the tyre clearance, it reduces the tyre contact patch. Over rocks and roots my contact patch is small enough already therefore, I would always plump for the larger sizes and if your frame does not block with mud perhaps you can run a bigger tyre too. More grip, less impact, better traction uphill and improved braking all for the asking. For the lightweight rider speed may be king but for most of us, a little more tyre in winter conditions helps us keep it rubber side down.
Posted by
Brighton mtb Club
at
3:23 PM
0
comments
Labels: Component Review, Show All
Friday, February 16, 2007
Koobi Saddle
All of us go through good and bad patches in almost every ride and sometimes a supportive ally can help considerably in a bad section, but times change and we all have to move on to pastures new. So I am saying goodbye to an old friend that has supported me for many a mile all over the South East and occasionally further a field.
We do not all look the same but I have noticed many a questioning glance at me and my friend Koobi. It may be the split long nose or the thin gel padding but looks can be deceiving and after a few thousand miles, I can strongly recommend it as a great long day saddle especially on a hot summer day over the
It is very lightweight but it does not flex and has been very hardwearing despite continuous summer and winter use. The slim profile allows free spinning without any thigh rub, which you might not feel, but notice the wear on your shorts. The gel is still soft and the saddle cover almost perfect but the leather at the nose has worn through probably due to less XC miles and more singletrack use. On and off the front, even with the saddle dropped, has caused the soft nose to wear through completely. However, after three years and thousand of miles I cannot complain about the sterling service given.
So if you ride mainly on bridleways and are looking for long day comfort with room to move about maybe try a split saddle and you could be surprised at the benefits.
Posted by
Brighton mtb Club
at
9:27 PM
0
comments
Labels: Component Review, Show All
Rim Tape
I remember the cloth tape and metal closures on the bikes of my childhood when drop handlebars and five gears were uber-cool, or groovy as no one used to say.
Elasticated rubber rim tape seems to be the ubiquitous choice today but in France, I found hard, yellow, plastic rim tape on a Michelin rack. I was unaware of this in the UK but I thought it could be worth an investment of a few euros.
It was a fairly tight fit as it had very little stretch but it seemed to grip better than rubber and hold itself in position firmly. It also seemed a slightly neater fit around the fat Schrader valve of a slime-filled tube, which might prevent water seepage.
Dry tubes seem to move easier in the tyre giving a supple feeling to the ride and if there is any water ingress the talcum sticks losing the benefit.
Occasional removal of the tyre and cleaning of the rim and the tube is needed to keep everything dry so anything that helps reduce maintenance is worth a try.
If anyone else has tried this type of rim tape it would be helpful to receive their use feedback.
Posted by
Brighton mtb Club
at
9:25 PM
0
comments
Labels: Component Review, Show All, Top Tips
Tuesday, February 13, 2007
Michelin Hot-S Tyres
Although these Michelin Hot S tyres in red have been widely publicised I have never come across anyone else using them on the trail. A strong carcass, good grip and excellent longevity make them a strong contender in the tyre choice stakes but everyone else chooses black.
The first version of these I tried were the C24 downhill version bought in France at a discounted £7. The Hot S had not been launched in the UK so they attracted a lot of trailside attention especially on an early silver Marin quad. Eventually Coed Y Brenin killed a sidewall but the tread had lasted well for months in all conditions.
The Hot S were lighter due in the main to the lighter sidewalls and a Kevlar bead and felt easier uphill. The tread stood up to all sorts of use and abuse and the change in the rubber compound improved the wet grip noticeably over the C24 but wet roots were still tricky.
The tread has spread to the new Michelin mountain range but with improved grip due to the dual compound application. They do not come in red but that clashes with an orange frame anyway. I read elsewhere that the reason for the colour was the request of the US market so perhaps the new American frame colours are too muted for a bright red tyre.
Overall, an excellent tyre that could be used as an all year round tyre and one that I would purchase again but only if it comes in orange.
Posted by
Brighton mtb Club
at
4:02 PM
0
comments
Labels: Component Review, Show All
Friday, January 19, 2007
Shimano XT & LX Hollowtech Cranksets
There are many cranksets available but the Shimano Hollowtech are our favourites due to: ease of fitting, ease of servicing, ease of bottom bracket bearing replacement together with widespread availability at approximately 1/3 off the recommended retail prices.
I have used XT version on full suspension bikes since March 2004 and the LX on my hardtail winter bike since June 2006. In my opinion there is zero difference in the ‘feel’ of the XT and LT cranksets when pedalling, both are very stiff and the fitting procedure and replacement bearings are the same for each. In each case the original Shimano chainrings last approximately 3 months of my riding while the bearings last 6 months in the summer and 3 months in the winter. We strongly recommend replacing worn chainrings with Middleburn Hardcote as soon as there is any sign of wear. Hardcote chainrings change almost as smoothly as Shimano but they last approximately 9-12 months. Both XT and LX use the same bearing replacement kit and the tools and procedure is the same for each. The printing on the crank arms wears off each pretty quickly but this doesn’t bother us. Both XT and LX are suited to our riding (nothing too extreme nor pottering along bridleways).
In our experience the main difference is a practical one, the XT rings have less metal and therefore it is easier to clean the mud from between the rings with a stick or narrow brush. This is very handy after muddy winter rides. XT is a few grams lighter in weight than LX but this is irrelevant to us when we weigh in at 13 stones and our lightest bike is 28 lbs.
So which is our favourite? I like the look of XT while my buddy prefers the look of LX, both are widely available at approximately £100.0 and £70.0 respectively. Our advice would be to go for LX (and put the £30.0 towards a bearing replacement kit) unless you really like the look of XT. Whichever you prefer we recommend removing the crankset from the frame and taking the chainrings off for thorough cleaning every couple of weeks. Always re-grease the bolts every couple of weeks to prevent them seizing.
The photos show my XT and LX Cranksets with a bash guard replacing the outer chainring.
Posted by
Brighton mtb Club
at
2:53 PM
0
comments
Labels: Component Review, Show All
Tuesday, January 09, 2007
Fox Vanilla Forks 130mm
After trashing 4 separate sets of air forks between us we now use coil forks, they seem to be much more reliable and also are very supple on both large and small bumps. These Fox Vanilla forks are 130 mm travel and are used on a hard-tail bike for general trail riding. They are disc specific and have a neat little brake hose retaining clip on the left leg. I tend to buy forks etc with minimal adjustment as I like to ride the bike and not spend excessive time fiddling to get things feeling right.
These forks are 130mm of travel and have the ‘green’ fox spring fitted which was recommended for my 13 stone weight. I have the rebound set 2 clicks off the fastest setting. The forks are very stiff and confidence inspiring and with the appropriate spring fitted for your riding weight they hoover up small bumps as if they don’t exist and yet they still take a pounding on drops of a couple of feet without bottoming or making any worrying noise!
Coil forks are no doubt heavier than the equivalent air versions; however the additional weight compared to me and the bike combined is a fraction of a %. I will stick to coil forks for my bikes for both performance and reliability.
Excellent fit and forget forks.
Posted by
Brighton mtb Club
at
5:12 PM
0
comments
Labels: Component Review, Show All
Tuesday, October 10, 2006
Lumicycle Nickel Metal Halide Lights
At this time of year a working set of lights is essential if you are to ride in the evenings. We have tried a number of manufacturers and different types of light, to date our favourites are the NiMH from Lumicycle.
The lights are rated as 10 watts HID arc lights, this is the equivalent of 40 watts of halogen light. Halogen lights are probably the most widely used bike lights and 10-20 watts is common. Thus the HID system has twice the illuminating power of the common halogen systems. It is not just the illumination however, as the HID light is a bright white light which is a marked contrast to the yellow light from halogen lights. On the trail all of this means that the HID lights are stunningly bright with greater distance penetration in the dark, they render halogen systems 'invisible' when placed side by side. We recommend paying the extra for a Lithium-ion battery as the juice used by the light is significant. Work out what you need in terms of battery life, then buy the next one up (you will regret it if you don't)! 4 hours is sufficient for our needs. We much prefer the user friendliness of the battery bag compared to the battery bottle.
Lumicycle lights come with a fantastically simple and effective quick-release cam for attaching to the handlebar or seatpost for a rear light. On the downside some lamp units have been supplied with a usleless cable socket, the cable kept falling out. Lumicycle replaced it with a tight fitting one and returned the unit to me within 3 days - excellent service. The light systems are packaged to order in the UK thus there is great scope for customisation eg a split cable from the battery to run both a front and rear light. Li-ion batteries are supplied with a 'smart' charger. We recommend a phone call to Lumicycle to discuss exactly what you need. The option to do this should not be overlooked.
We recommend specifying a tight cable socket, a stiff switch, Li-ion battery in a bag, a NiMH lamp, a rear light and the 1.2 metre 'Y' cable length. This will enable the battery to be palced anywhere on the bike or in your bag and with the 'Y' cable you can run both front and rear lights.
Slightly more powerful light systems are available; however the performance increase is way below the price premiums that are charged.
Posted by
Brighton mtb Club
at
5:07 PM
0
comments
Labels: Component Review, Show All
Wednesday, October 04, 2006
Mud Tyres
In our area of the UK winter riding means pedalling through thick gloopy mud that rapidly sticks to all parts of the bike including the tyres. We have found that large volume trail tyres with a 'grippy' tread instantly become completely blocked with mud rendering them useless.Panaracer Trailraker tyres are the most suitable for our winter conditions, they don't get clogged up with mud and they give suprisingly good grip on most surfaces (not wet chalk!). Trailrakers appear to be a modification of the Panaracer Fire Mud-pro and our experience they offer more traction but are less stable when cornering in mud.
We use the 1.95 inch Trailrakers as general purpose tyres from October until March, a period that includes many north and south downs rides, sometimes hub deep in mud and sometimes in damp loam. Trailrakers in combination with 'slime' tubes help us to keep going throughout the winter months.
Posted by
Brighton mtb Club
at
8:45 AM
0
comments
Labels: Component Review, Show All
Monday, October 02, 2006
Workstands
A few pearls of wisdom reflecting our experiences with workstands.
Wheel stands
These hold the bike upright in a balanced position rather than in a rigid hold. The rear tyre is held in tension and although it is a great way to hold the bike when washing and general cleaning e.g. brake discs, it is not ideal for some set-up tasks. Holding the wheel elevates it slightly causing a difference in the relative wheel heights, which makes it awkward to adjust saddles etc. It is possible to oil the chain but the bike must be in the correct gear to avoid a clash between the derailleur and the stand. A wheel stand is also useful for holding the bike when removing certain components, e.g. pedals. Its’ best use, however, is on the trail when unloading your bike from the car at the start of a ride. Take out the bike, put it in the stand, sort out your riding gear and when you return use a wheel stand while cleaning the bike down.
Workstands
Portable stands, folding stands and fixed stands can all be used as a main work stand; however if space is limited the fixed stand may be too bulky. There are some key factors in choosing a stand but the most important are; will it fit into your workspace and is it stable enough to hold your bike. Basically, get one that has wide and sturdy legs. We like to get at the bike from both sides when it is in a workstand, stands that can be bolted onto a wall prevent this and are not for us. The vertical upright should be adjustable for height to help get a comfortable working position, having the ability to lock the positioning with one hand is very useful. Secondary rotation allows lifting and lowering the front and rear of the bike when adjusting brakes and checking suspension links. A stepped or incremental control may be preferable to a friction lock as the torque on the rotation point can require a very high friction resistance. The ability to adjust the horizontal overhang helps to balance the mass of the bike over the centre of the base. The clamp can be either a screw or a cam lock with a screw adjustment. The cam lock is easier to clamp and unclamp quickly which is helpful when lifting a bike with one hand. The clamp-jaws need to accommodate different diameter seat posts as well as clamp securely without crushing.
Posted by
Brighton mtb Club
at
3:11 PM
0
comments
Labels: Component Review, Show All
Friday, September 29, 2006
Hope Mono M4 Brakes
Hope mono M4 hydraulic disc brakes are sold as ‘all mountain’ which we presume means suitable for a little bit of everything. Out of the box it is immediately obvious that the CNC machine work is of a high standard, the bolts are a perfect fit and the rotors are nice and shiny with no trace of cutting lubricant. A sealed plastic bag contains the required spacer shims. Previous experience of brakes has resulted in us selecting 180mm rotors as we are no lightweights and we want to stop when we apply the brake.
Fitting the rotors to hubs is straightforward with a drop of threadlock on each bolt. Fitting the callipers is not quite as simple, the callipers need to be shimed or spaced from the frame to centre about the rotor. This is not difficult but it either takes 2 minutes or 1 hour depending on how lucky you get.
How do they perform? The stopping power and modulation is absolutely fantastic. The only downside once the brakes are fitted is that replacing the pads is a fiddle job which needs the wheels to be removed and the use of long-nose pliers. This in itself is not too painful but it is unnecessary when compared to the very simple pad change processes of HAYES and AVID. The brakes can squeak when wet but this always goes once the rotor is dry.
Fantastic breaking power and modulation, pads are widely available 8 out of 10, a telephone call to HOPE provides detailed answers to any question. A redesign on the pad change process and the mono M4 would be 9 out of 10.
Posted by
Brighton mtb Club
at
2:53 PM
0
comments
Labels: Component Review, Show All
Sunday, September 24, 2006
White Lightning Original chain lube
I have used White Lightning Original for about 4 years, it is a fantastic chain lube for dry and intermediate conditions. I believe it is a wax emulsion dispersed in a very mild solvent. Whatever, I find gear changes are very smooth and importantly it does not attract dirt and mud onto the chain in the same way that conventional oils seem to.I have found that the following procedure gives the best results. When you first start to use it on a chain shake the bottle until there is no residue visible at the bottom, then apply to a clean (throughly degreased and dried) dry chain while rotating the chain backwards, leave overnight to dry, then repeat the process for 3 days. This seems to allow the lube to throughly penetrate into all the pin/plate joints. Subsequent applications are a single dose on the chain after the bike has been cleaned.
Although sold as a dry weather chain lube I use it from March to October, a period that includes many wet and muddy rides. Highly recommended.
Posted by
Brighton mtb Club
at
9:21 AM
0
comments
Labels: Component Review, Show All
Tuesday, September 19, 2006
Pumps
Everyone needs one of these, always carry one with you because when you do not have it is when you will need it. Mini pumps vary in price however a cheaper unit is not the same as a less expensive unit so choose with care. There are different kinds of mini pump with short stroke, long stroke and double piston types, the mechanism of operation can affect the number of cycles that may be required to pump up a larger volume tyre e.g. 100 pushes. The key thing is ease of use.Try it out in the shop and imagine cold fingers, lots of mud and driving rain, if it is fiddly in the shop forget it. Check that the handle is large enough and of the appropriate shape (straight or 'T') to be comfortable to use in your hand, ease of attachment to the valve is also important, we think that a lockable attachment to the valve is far better than having to hold it in place. Some mini pumps come fitted with a small footplate and a flexible hose to the valve connector, as well as a pressure gauge. These are useful but I perfer simplicity. Finally, we recommend buying one that is from an established manufacturer as spare parts are likely to be more widely available. Apart from an occasional clean and re-grease it should provide years of service.
Desirable, small, quick and less effort than a pump make CO2 cartridge systems very popular. There are two types of cartridge (screw on and push on) but some valves cope with both. A word of warning all the cartridges get very cold during use and some cartridges have a rubbery sleeve to prevent frozen fingers in use, go for these if you can find them. Pressure levels can be difficult to judge and if you have one cartridge you do not want a second flat immediately? We think that CO2 inflators are a great addition to your trail bag but only if compliamented by a mini pump in case of multiple punctures. Of the head mechanisms we have tried we much prefer the simple head/sleeve type with a trigger to control inflation. Once they start having handles etc they become too bulky and complicated. Remember to take empty canisters home even if you are sure that they are fully discharged.
The Track pump is an essential workshop/garage tool, money very well spent and you will never look back. Track pumps give fast inflation that significantly reduces the chore of changing tubes and swapping tyres. Buy one that has a large base and a footplate together with a gauge that is at the top of the barrel, for ease of view and use, in addition a connector that locks onto the valve is essential so that you can get both hands on the pump handle. Plastic units are lighter than the metal ones but are not necessarily less stable. Buy a good one (ie from one of the well known brands) in a sale rather than a cheaper unit and it should last for years. I have had mine for 6 years and it works perfectly only requiring a regrease every couple of years.
Posted by
Brighton mtb Club
at
8:39 AM
0
comments
Labels: Component Review, Show All
Monday, September 18, 2006
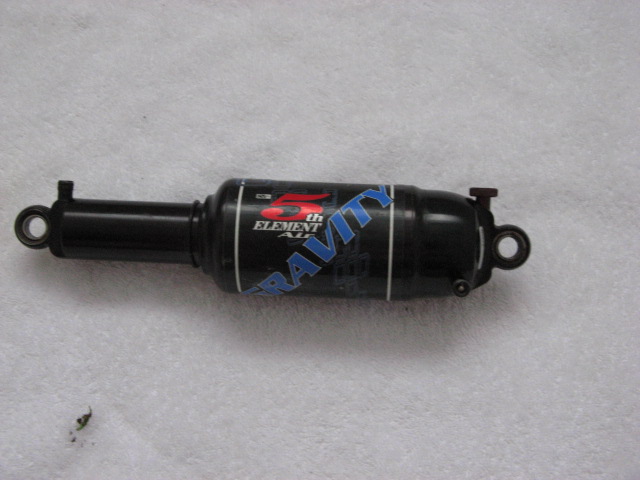
5th Element Gravity Air Shock
What is this like, in a word, rubbish. Two of our gang have had these shocks and had identical experiences. The shock has two air chambers that are pressurised independantly of each other. One chamber is for the main shock the other for the 'platform' action. Pumping to the recommended starting pressures is straightforward and the valves do hold the pressure well. Optimising the pressures is not too time consuming and just requires on trail adjustments for the first couple of rides. It was obvious when the shock was set-up correctly: very little bobbing combined with active suspension that smoothed the trail. Very impressive.The shock retained the 'optimised' feel for about one month and then the suspension action became increasingly stiff to the point where after approximately a further 2 weeks it would not move at all unless the pressure was reduced to almost zero. After much fiddling the shock was sent to TFtunedshox who diagnosed the problem very quickly. It was dead. Servicing would not help as the parts required were not covered by warranty, the cost of repair would be in the order of £150-00.
As stated above two of us had identical experiences and had to buy a completely new shock. When it worked it was good, the problem was it only worked for about 1 month!
Posted by
Brighton mtb Club
at
2:06 PM
0
comments
Labels: Component Review, Show All
Tuesday, September 12, 2006
Fox 36 Forks: Van or TALAS
My buddy and I ride the same bike, in the same size and for 1 month we had different forks, I had Talas the Fox36 Talas while he had the Fox36 Vanilla. This review is based on our experience of the forks. The main differences on paper are that the Talas and Vanilla are air and coil sprung respectively, the travel of the Talas is adjustable 110-150mm while the Vanilla is fixed at 160mm, the Talas weighs 0.5lb less than the Vanilla, but when the bike is 32-35 lbs the additional fork weight is irrelevant. In reality it is on the trail where there were noticeable differences .
Posted by
Brighton mtb Club
at
6:34 PM
0
comments
Labels: Component Review, Show All
Sunday, September 10, 2006
Pedals
Unless the jump scene draws you immediately cross country trails include a lot of uphills and although the distance up and down may be the same the time spent on the ups far exceeds the downs. It is possible to remain with flat pedals however if you are riding with others who are clipped in it seems that there is a clear advantage on long or steep uphills and on technical climbs there is an always an extra pedal stroke just when it is most needed. The main difficulty in being clipped in is being clipped in. Even with loose settings and soft practice in the garden there will be episodes where being attached to the bike will have you grasping at trees, lunging at gates and landing sideways in “frozen panic” mode.
The good design of the budget shimano offering is spoiled by its deserved reputation for a tight fit and an unwillingness to release easily. A one sided pedal such as the FPD offering allows starting on a large flat side and then rotating it to the clipped side. This gives the rider of a choice depending upon the conditions faced I.e. clipped for a hill and a flat for a technical section. Although it could be a solution in itself it is also a transit stage to a double clipped model after a reasonable level of competence had been achieved.
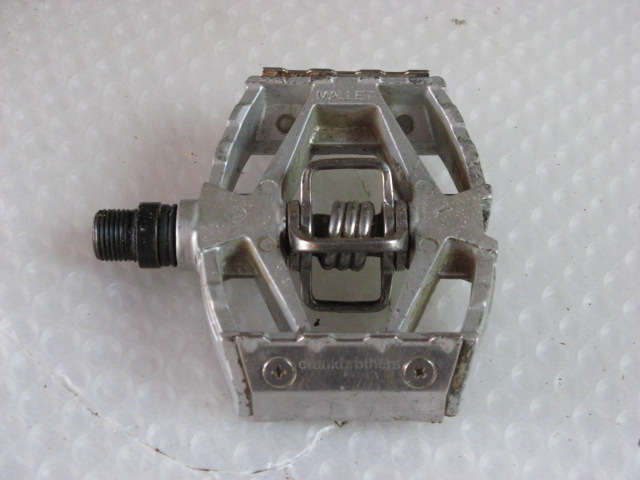
An outer cage can be a better solution for difficult conditions than either flat or mini clipped pedals because the weight penalty is a small price for instant pedalling action. Mud clearance is poor on many pedals and this road leads to the more expensive solution irrespective of the pedal type. Higher margins for the manufacturers open the door to improved design and rarer materials like stainless steel, carbon fibre and magnesium. Crank Bros. Have successfully moved away from the conventional Shimano design to a rotating system that offers great mud clearance in a variety of flat and open options. As others follow suit it is worthwhile to check all the options to find the best solution for yourself.
For the cautious the ideal route needs to allow small changes without jeopardizing hard won gains. Moving from flat to one sided to caged allow time to make small adjustments and any one could be the ideal solution for some and allow you are racing or very concerned with weight a larger platform makes life easier especially on the dark or in poor conditions . As for lifetimes pedals need servicing and rebuilt with spares or replacement every couple of years depending upon usage. Prices range from a few pounds for basic flats to a lot more for anything in gold plate but that comes with the guarantee that on the trail you will not see any others.
Posted by
Brighton mtb Club
at
12:12 PM
0
comments
Labels: Component Review, Show All